Version 0.1 - Last Updated: 08 Jul 2025
Administering system users - Creating new users
Assigning permissions to a new user
Group memberships
Step 5 - Select a group for the new user
Go to the Group dropdown and select the group that you want to assign to the user.
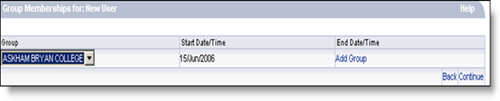
Step 6 - Add the user to a group
Select Add Group.
If there is more than one group available, repeat step 4 and step 5 until you have added all the groups you want to assign to the new user.
Step 7 - Finish assigning groups
Select Continue. This will take you to the Role Memberships page.
Role memberships
Step 8 - Select a role to assign
Go to the Role dropdown and select a role to assign to the user.

You must assign the HEI User role to all users.
See System roles for more information on roles.
Step 9 - Add system roles
Select Add Role.
Repeat steps 8 and 9 until you have added all the roles the user needs.
Step 10 - Finish adding system roles
Select Continue. This will take you to the Credentials for New User page.
Credentials
Step 11 - Continue to confirm details
The Credentials for New User page is for setting and resetting sign-in details. You do not need to do this when you create a new user.
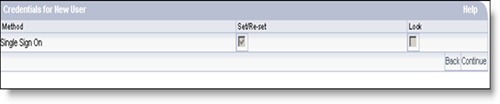
Select Continue again to move to the next page.
Confirm details
Step 12 - Get sign-in details for the new user
The Confirm Details page is where you can see user details including memberships and an auto-generated password.
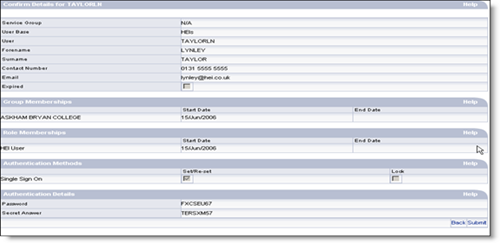
You must take a screenshot of this page or print it, so that you can tell the new user their username and password.
You will not be able to access this information in any other way.
Step 13 - Complete creating the new user
Select Submit. The new user has now been created. The system will take you back to the User Administration page.
Print this page