Version 0.1 - Last Updated: 08 Jul 2025
HE Gateway user guide
The purpose of this guide
What is the HE Gateway?
We provide administration services to universities and colleges in support of student funding. The HE Gateway is a secure website that has been developed for these online services.
This guide outlines basic processes and procedures you should follow when you use the HE Gateway. It also covers the available functions, help resources and general best practice rules.
The HE Gateway works on the following browsers
- Microsoft Edge
- Mozilla Firefox, version 59 and above
- Google Chrome, version 74 and above
Definition of terms
A list of common acronyms used throughout this guide:
| Term | Definition |
| CMS | Courses Management Service |
| FIS | Financial Information Service |
| HE | Higher education |
| HEI / HEP | Higher education institution / Higher education provider |
| HE Gateway | Portal access for each HEI / HEP |
| SIS | Student Information Service |
| SLC | Student Loans Company |
Further assistance
If you need further help after reading this guide, please contact our Partners Support Desk.
How to access the HE Gateway
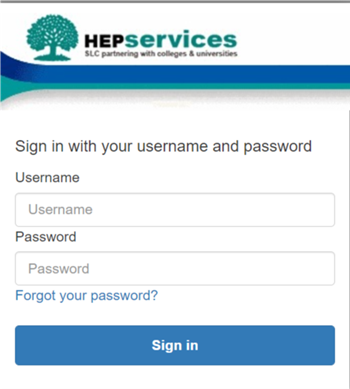
Signing in
You can access the HE Gateway services through this website. Follow the Sign into the HE Gateway link from the homepage or at the top of any page. The link leads to the sign in and authenticate page for the HE Gateway.
Signing in for the first time
When you sign into the system for the first time, you will need to create a new password. This helps to keep your account secure.
- Enter your username and choose to Reset my password. We will automatically send you an email with a code.
- Enter the code you get by email.
- Enter a new password and confirm it.
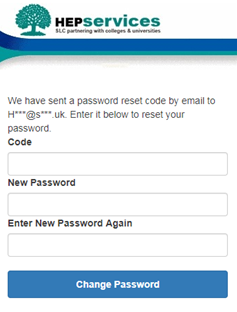
Your password is case-sensitive. It must be at least 10 characters in length and must contain at least one letter, number and a special character. It cannot contain easily guessed words or sequences such as your username or 'password1'.
- Select Change Password to sign into the system for the first time.
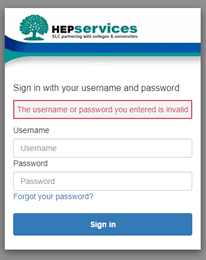
Using an incorrect username or password
If you enter your username or password incorrectly, the system will prompt you to try again.
- If you have forgotten your password, select the Forgot your password? link on the sign-in page.
- The system will ask you to enter your username. Once you have done this, select Reset Password. We will automatically send you an email with a code.
- Enter the code you get by email.
- Enter your new password and confirm it.

Your password is case-sensitive. It must be at least 10 characters in length and must contain at least one letter, number and a special character. It cannot contain easily guessed words or sequences such as your username or 'password1'.
- Select Change Password.
- The system will ask you to sign in with your username and the new password you have just set up.
Security
You need to be vigilant about usernames and passwords. If someone leaves your college or university, your User Administrator must expire their account on the system. This helps to ensure the security of the HE Gateway.
Expiring user accounts
Once a user’s account is expired, their records cannot be amended or reinstated.
- To begin administering users, select User Administration from the HE Gateway Home page.
If you only have access to a single user group, you will see the user list. If you have access to more than one user group, you must select the user group to display the corresponding user list. - From the user list, select Edit to go to the user’s Profile page.
- Select Expire Account. This will take you to the Confirm Details page.
- Select Submit to expire the user account. This will take you back to the User Administration page.
System roles
Roles for the Bursary Administration Service
Which system roles does my organisation need?
To operate each service, your university or college must hold at least one of each role. You can give each user more than one role. All users must have the HEI User role.
User roles
HEI User
The user administrator must assign this role to all HE Gateway users. It enables basic access to view pages.
HEI User Administrator
HE Gateway users who can maintain user accounts within their own user base. This includes setting up new users, allocating roles and resetting passwords.
It is important that you have more than one user with this role, to cover holidays and other time away.
HEI Bursaries Senior Administrator
HE Gateway users who can maintain the Institution Profile and award information. They will be able to set up new payment profiles and create and activate awards.
HEI Bursaries Approver
HE Gateway users with full access to student list functions. They can approve award sets and cancel, reinstate and override payments.
You may need more than one Approver because if an Approver is the last person to amend a student's entitlements, they cannot approve these entitlements.
Alternatively, if you only have one Approver, an Assessor must make these amendments.
HEI Bursaries Assessor
HE Gateway users with full access to student list functions. They can cancel, reinstate and override payments. They cannot approve award sets.
HEI Bursaries Advisor
HE Gateway users with full access to some student list functions and read-only access to others.
Roles for the Courses Management Service
Which system roles does my organisation need?
To operate each service, your university or college must hold at least one of each role. You can give each user more than one role. All users must have the HEI User role.
User roles
HEI User
You must assign this role to all HE Gateway users. It enables basic access to view pages.
HEI Course Advisor
HE Gateway users who have read-only access to course information to deal with general enquiries.
HEI Course Administrator
HE Gateway users who can view and maintain the Institution Profile and course information.
HES Courses User Administrator
HE Gateway users who can maintain user accounts within their own user base. This includes setting up new users, allocating roles and resetting passwords.
HEI Course Web Service User
HE Gateway users who can view and maintain the Institution Profile and course information.
Roles for the Student Information Service
Which system roles does my organisation need?
To operate each service, your university or college must hold at least one of each role. You can give each user more than one role. All users must have the HEI User role.
User roles
HEI User
You must assign this role to all HE Gateway users. It enables basic access to view pages.
HEI Attendance Administrator
HE Gateway users who can view and maintain the attendance worklist.
HEI CoC Administrator
HE Gateway users who can view and maintain the CoC worklist.
HEI CoC Advisor
HE Gateway users who have read-only access to the list of CoCs to deal with general enquiries.
HES SIS Report Advisor
HE Gateway users who have read-only access to SIS reports to deal with general enquiries.
HEI Student Information Advisor
HE Gateway users who have read-only access to the Student Information page to deal with general enquiries.
HEI SIS User Administrator
HE Gateway users who can maintain user accounts within their own user base. This includes setting up new users, allocating roles and resetting passwords.
HEI Registration Administrator
HE Gateway users who can view and maintain the registration worklist.
HEI Combined Administrator
HE Gateway users who can view and maintain the combined worklist.
Using the HE Gateway
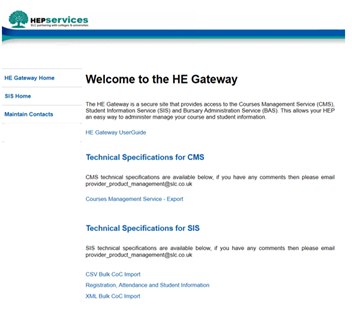
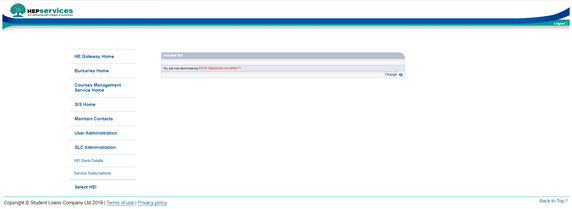
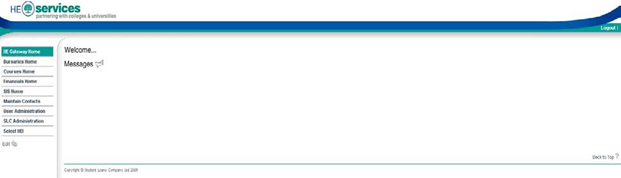
HE Gateway Home page
All users can access the HE Gateway Home page.
The HE Gateway is an application rather than a simple web page. Do not use the web browser’s back and forward buttons to move through pages, you are likely to get unexpected results. Instead, use the on-screen buttons and menus to help you navigate.
The options you can see will depend on your role in the system. See System roles for more information.
Options you may see
| Option title | Description of purpose |
|---|---|
| Bursaries Home | Takes you to the Bursary Administration Service (BAS) homepage. To learn more about how to use this service, see the Bursary Administration Service user guide in the BAS section of the HE Gateway. |
| Courses Home | Takes you to the Courses Management Service (CMS) homepage. To learn more about how to use this service, see the Courses Management Service user guide. |
| SIS Home | Takes you to the Student Information Service (SIS) homepage. To learn more about how to use this service, see the Student Information Service user guide. |
| Maintain Contacts | Follow this link to view and update the list of contacts for your university or college. See Maintaining HEI contacts for more information. |
| User Administration | This section is where User Administrators can maintain user accounts. See Administering System Users for more information. |
| Select HEI | Use this option to select a college or university to administer, if you have access to more than one HEI. |
Other features of the home page
Message area - News and other information items will appear in this area, in the centre of the page.
Back to top link - You can use this link to return to the top of the page, without having to scroll.
Logout link - Use this link to end your session. It is at the top of the home page and all other pages of the HE Gateway.
Error messages
Alerts for user errors
The system will display error messages at the top of the page. For example, you will get an error message if you have not filled a mandatory field, or there is incorrectly formatted data.

In these cases, you can correct the error and continue.
Alerts for system errors
If there is a problem with the system, the error message will be more technical, for example ‘An unrecoverable system error has occurred’.

If you encounter these sorts of error messages, contact our Partners Support Desk for assistance.
Getting help
The HE Gateway includes an online help facility. Select Help to open help for the page you are on. This will open in a separate browser window. Use the scroll bar to move through the help text. You can resize the window. Select the cross to close help.
Telephone or email assistance
If you have any problems using the HE Gateway, please contact our Partners Support Desk or email one of the mailboxes listed below.
To speak to the support desk team, you must be set up as a contact for your university or college on the HE Gateway. See Maintaining HEI contacts for more information.
Email contacts
Bursary Administration Service (BAS) – bursary@slc.co.uk
Courses Management Service (CMS) – hep_services@slc.co.uk
Financial Information Service (FIS) – fis@slc.co.uk
Student Information Service (SIS) – sis@slc.co.uk
You can find opening times for the Partners Support Desk on the Contact us page.
Selecting an HEI
All users can access the HEI selection. If you only have access to one HEI - university or college - it will be the default selection when you sign in to the HE Gateway. If you try to choose Select HEI in the main menu, you will see a message that says, ‘Your HEI has been determined. You are not permitted to choose another HEI’.
If you have access to more than one HEI, you must select which HEI you want to administer. You can only administer one HEI at a time.
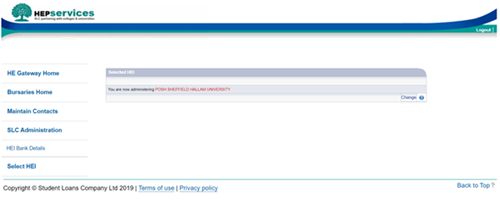
Step by step
- Go to the Home page and choose Select HEI from the menu. This will take you to the Selected HEI page. If you have already been working on an HEI, the system will show the name of the HEI.
- Select Change.
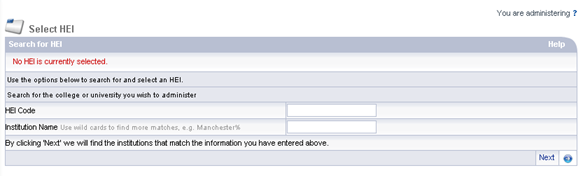
- Find the university or college using the HEI Code or Institution Name.
You can use the wildcard ‘%’ when searching for a name, though you must also use at least 3 letters. You may use 2 wildcards – for example, %York% will pick up university or college names that contain York, whereas York% will pick up those that start with York. Your search will only pick up universities and colleges that you have access to.
If you are using the HEI code, you cannot use wildcards – the code must be an exact match.
You cannot submit a blank search – you must enter either an HEI code or part of an institution name. Similarly, you cannot use the wildcard alone – you must also enter a character combination.
- Select Next. The organisations matching your search criteria will return in search results. If there is only one organisation matching your search it will automatically display.
- Select the entry in the HEI Name column to pick the organisation you want to administer.
If the university or college is not listed, select Back to return to the Select HEI page and search again.
Maintaining HEI contacts
The HE Gateway holds a list of contacts at HEIs (universities and colleges) that use each service.
All users with more than read only access can maintain contact information for their organisation.
Each contact is assigned one or more contact roles. If we need to get in touch with someone at your university or college, we can use this list to identify the most appropriate person. We'll also send service updates and news bulletins to this list of contacts.
You should always keep your organisation’s contacts updated. An out of date contact list could lead to delays in processing payments.
If you are making changes to your university or college’s bursary contacts, remember to send a copy of the changes to bursary@slc.co.uk so we can update our internal database too.
Adding contacts
Follow these steps to add a new contact for your college or university.
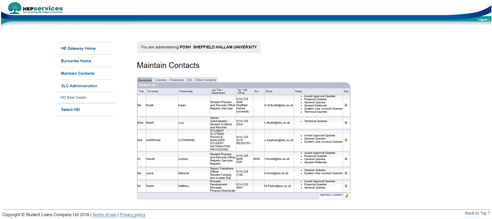
Step 1 - maintain contacts
From the Home page and select Maintain Contacts. This will take you to the contact list on the Maintain Contacts page.
Step 2 - create a new contact record
Select Add New Contact. This will create and display a new, blank, contact details record.
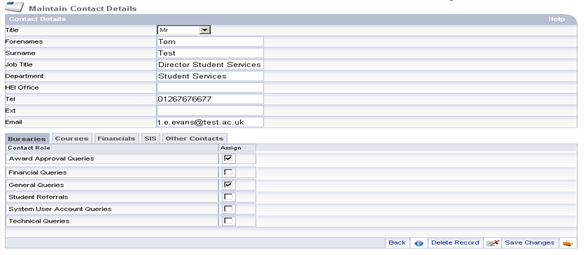
Step 3 - provide contact information
Enter details of the person who will be a new contact. The following are mandatory fields:
- Title
- Forenames
- Surname
- Job Title
- Department
- Tel
Step 4 - assign roles
Use the Assign checkboxes to select the roles the new contact should have. Deselect a role if you want to remove it. There is no limit on the number of roles you can assign.
Step 5 - Complete creation of the new contact
Select Save Changes to add the new contact to those listed for your organisation.
Select Back to return to the contact list.
Editing contacts
Follow these steps to add edit an existing contact for your college or university.
Step 1 - maintain contacts
To edit an existing contact, go to the HE Gateway Home page and select Maintain Contacts. This will take you to the contact list on the Maintain Contacts page.
Step 2 - Find the contact you want to edit
Contacts are ordered by surname. Find the contact you want to edit and select the edit icon.
Step 3 - Making changes
Make any changes you need to the existing contact details. Remember, the following are mandatory fields:
- Title
- Forenames
- Surname
- Job Title
- Department
- Tel
Step 4 - Save your changes
After you're satisfied all changes have been made, select Save Changes.
Deleting contacts
Follow these steps to delete an existing contact for your college or university.
Step 1 - maintain contacts
First, go to the HE Gateway Home page and select Maintain Contacts. This will take you to the contact list on the Maintain Contacts page.
Step 2 - Find the contact you wish to delete
Contacts are ordered by surname. Find the contact you want to delete and select the edit icon.
Step 3 - Delete the contact and confirm
Select Delete Record.
To confirm the deletion, select Save Changes.
Administering system users
The HE Gateway allows those with full access, User Administrators, to create and maintain user accounts. They can create accounts using a defined structure of a User Base, then User Groups and User Roles.
The User Administrators at your university or college are responsible for creating and administering system users for your organisation.
User Base
A user base is a collection of users. The user bases within the HE Gateway are:
- HEIs – Bursaries
- HEIs – Courses
- HEIs – Financials
- HEIs – SIS
User Group
A user group is an organisational group with which a user is associated. The user group determines which customer records a user can process.
Normally, this will be the name of your university or college (and any associated organisations).
User Role
A user role is the level of access a user has to a system. A user can hold many roles, depending on the level of access and responsibility they have. See System roles for more information.
User administration
To begin administering users, go to the HE Gateway Home page and select User Administration.
If you have access to more than one user group, the User Group page will appear. From this page, you can select a specific user group to show the user list that belongs to it.
If you have access to a single user group, or you have already chosen a user group, you will see the user list straight away.
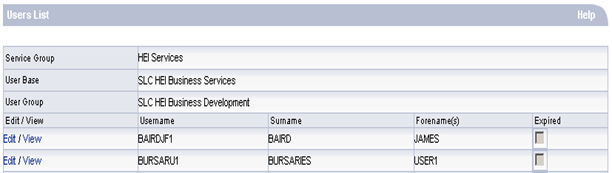
The user list shows all the users in the selected user group. From this page, you can create new users and administer existing users.
Creating new users
Follow these steps to create a new HE Gateway user for your college or university.
Step 1 - user administration
Go to the HE Gateway Home page and select User Administration.
Step 2 - create a profile for the new user
Select Create New User. This will take you to the Profile for New User page.

Step 3 - provide user information
Enter the details of the new user. The following fields are mandatory:
- Forenames
- Surname
- Contact No
- Email address
Step 4 - authorisation and authentication
Select Authorisation and Authentication. This will take you to the Group Memberships page where you can assign permissions to the new user.
Assigning permissions to a new user
Group memberships
Step 5 - Select a group for the new user
Go to the Group dropdown and select the group that you want to assign to the user.
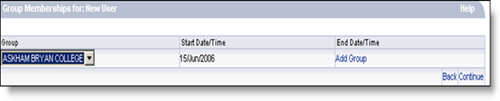
Step 6 - Add the user to a group
Select Add Group.
If there is more than one group available, repeat step 4 and step 5 until you have added all the groups you want to assign to the new user.
Step 7 - Finish assigning groups
Select Continue. This will take you to the Role Memberships page.
Role memberships
Step 8 - Select a role to assign
Go to the Role dropdown and select a role to assign to the user.

You must assign the HEI User role to all users.
See System roles for more information on roles.
Step 9 - Add system roles
Select Add Role.
Repeat steps 8 and 9 until you have added all the roles the user needs.
Step 10 - Finish adding system roles
Select Continue. This will take you to the Credentials for New User page.
Credentials
Step 11 - Continue to confirm details
The Credentials for New User page is for setting and resetting sign-in details. You do not need to do this when you create a new user.
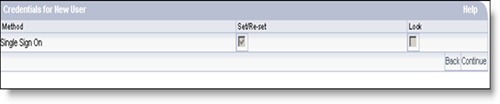
Select Continue again to move to the next page.
Confirm details
Step 12 - Get sign-in details for the new user
The Confirm Details page is where you can see user details including memberships and an auto-generated password.
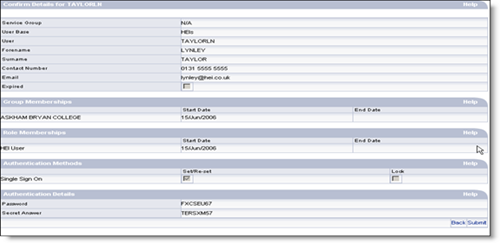
You must take a screenshot of this page or print it, so that you can tell the new user their username and password.
You will not be able to access this information in any other way.
Step 13 - Complete creating the new user
Select Submit. The new user has now been created. The system will take you back to the User Administration page.
Administering existing users
If you have User Administrator access to the HE Gateway, you can:
- amend user names
- amend user contact details
- amend user roles and groups
- reset, cancel or activate sign-in details
- expire user accounts
Follow these steps to amend details for an existing HE Gateway user.
Step 1 - User administration
From the Home page select User Administration.
If you only have access to a single user group, the system will take you straight to the User List.
Step 2 - If you have access to more than one group
Select the relevant user group to see the corresponding User List.
Step 3 - Find the user you wish to amend
From the User List page, select the username of the person that you want to administer. This will take you to the user’s Profile page where you can make the changes.
Amending personal details
Step 4 - amend name or contact details
From the Profile page, you can amend the user’s:
- forenames
- surname
- contact telephone number
- email address
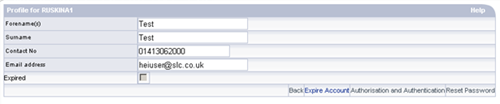
To make the changes, overtype the current data in the relevant fields on the page. Changing the user’s forenames or surname here will not generate a new username.
If the Expired checkbox is ticked, you cannot amend any of the user's details.
Amending group memberships
After amending a user's personal details, you can also amend their group memberships.
Step 5 - authorise and authenticate
From the user’s Profile page, select Authorisation and Authentication. This will take you to the Group Memberships page for the user.

Step 6 - adding a group for the user
Select the group that you want to add from the Group dropdown. Select Add Group to add the user to the group.
Step 7 - remove a group for the user
Select Expire to remove the user from an existing group.
Repeat steps 6 and 7 if necessary, until the user is assigned to the correct group memberships.
Step 8 - finish amending groups
Select Continue. This will take you to the Role Memberships page for the user.
Amending role memberships
After amending a user's personal details and group memberships, you can also amend their role memberships.
Step 9 - adding a role for the user
Select the role that you want to add from the Role dropdown. Select Add Role to add the role to the user.

Step 10 - remove a role from the user
Select Expire to remove an existing role from the user. See System roles for more information on roles
Repeat steps 6 and 7 if necessary, until the user is assigned to the correct group memberships.
Step 11 - finish amending roles
Select Continue. This will take you to the Credentials page for the user.
Amending credentials
If the user has locked their account by entering the wrong username or password 3 times, the Lock box will be checked.

Step 12 - unlocking a locked account
On the Credentials page, the Lock box will be checked if the account has been locked.
Remove the check from the Lock box to unlock the account
Step 13 - continue to confirm details
Select Continue to move the Confirm Details page.
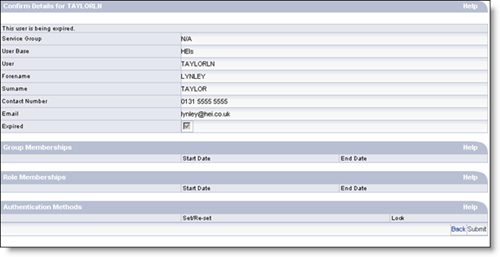
Confirming amended details
The Confirm Details page shows a summary of the user’s memberships and sign-in information.
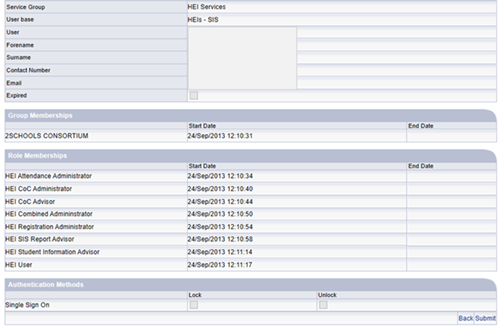
Step 14 - complete amending user details
Select Submit. The user details will be saved and the system will take you back to the User Administration page for that user.
Removing user accounts
You can expire a user’s account if it is no longer needed, for example, if they leave the university or college or their role changes.
Once you have expired a user’s account, you will not be able to amend or reinstate their records.
Expire a user account
Step 1 - start expire account process
From the user’s Profile page, select Expire Account. This will take you to the Confirm Details page.
To cancel the expire account process, select Back.
Step 2 - complete the expire account process
Select Submit. This will expire the user’s account and details. The system will take you back to the User Administration page.
Change of bank details
If you need to change your organisation’s bank details, you must follow the process of emailing these described here. This ensures that we have all the correct details and can update these for you as soon as possible.
Process
You must submit any requests to change your organisation’s bank details on official headed and dated paper. This must be signed by a senior member of your financial team. It must clearly state the new bank details that we need to change our records to.
You need to then scan and email this to fee_enquiries@slc.co.uk.
You should also add in the subject line of the email 'URGENT - Change of HEP bank details.'
Once we receive the request, we'll update the details on our system within 5 working days (subject to secondary validation being successfully completed). You'll receive an email to confirm the change.
Help with this process
If you need any help with this process please contact our Partners Support Desk.