Version 0.1 - Last Updated: 08 Jul 2025
Administering system users
Administering existing users
If you have User Administrator access to the HE Gateway, you can:
- amend user names
- amend user contact details
- amend user roles and groups
- reset, cancel or activate sign-in details
- expire user accounts
Follow these steps to amend details for an existing HE Gateway user.
Step 1 - User administration
From the Home page select User Administration.
If you only have access to a single user group, the system will take you straight to the User List.
Step 2 - If you have access to more than one group
Select the relevant user group to see the corresponding User List.
Step 3 - Find the user you wish to amend
From the User List page, select the username of the person that you want to administer. This will take you to the user’s Profile page where you can make the changes.
Amending personal details
Step 4 - amend name or contact details
From the Profile page, you can amend the user’s:
- forenames
- surname
- contact telephone number
- email address
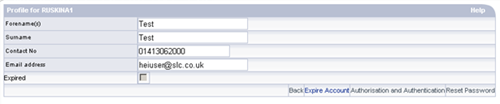
To make the changes, overtype the current data in the relevant fields on the page. Changing the user’s forenames or surname here will not generate a new username.
If the Expired checkbox is ticked, you cannot amend any of the user's details.
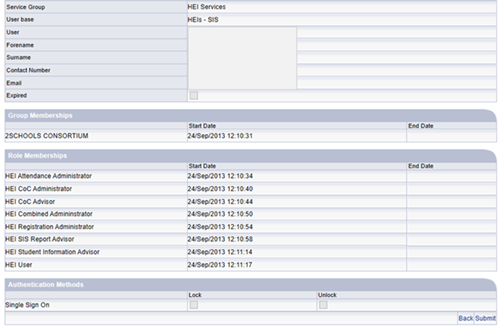
Amending group memberships
After amending a user's personal details, you can also amend their group memberships.
Step 5 - authorise and authenticate
From the user’s Profile page, select Authorisation and Authentication. This will take you to the Group Memberships page for the user.

Step 6 - adding a group for the user
Select the group that you want to add from the Group dropdown. Select Add Group to add the user to the group.
Step 7 - remove a group for the user
Select Expire to remove the user from an existing group.
Repeat steps 6 and 7 if necessary, until the user is assigned to the correct group memberships.
Step 8 - finish amending groups
Select Continue. This will take you to the Role Memberships page for the user.
Amending role memberships
After amending a user's personal details and group memberships, you can also amend their role memberships.
Step 9 - adding a role for the user
Select the role that you want to add from the Role dropdown. Select Add Role to add the role to the user.

Step 10 - remove a role from the user
Select Expire to remove an existing role from the user. See System roles for more information on roles
Repeat steps 6 and 7 if necessary, until the user is assigned to the correct group memberships.
Step 11 - finish amending roles
Select Continue. This will take you to the Credentials page for the user.
Amending credentials
If the user has locked their account by entering the wrong username or password 3 times, the Lock box will be checked.

Step 12 - unlocking a locked account
On the Credentials page, the Lock box will be checked if the account has been locked.
Remove the check from the Lock box to unlock the account
Step 13 - continue to confirm details
Select Continue to move the Confirm Details page.
Confirming amended details
The Confirm Details page shows a summary of the user’s memberships and sign-in information.
Step 14 - complete amending user details
Select Submit. The user details will be saved and the system will take you back to the User Administration page for that user.
Removing user accounts
You can expire a user’s account if it is no longer needed, for example, if they leave the university or college or their role changes.
Once you have expired a user’s account, you will not be able to amend or reinstate their records.
Expire a user account
Step 1 - start expire account process
From the user’s Profile page, select Expire Account. This will take you to the Confirm Details page.
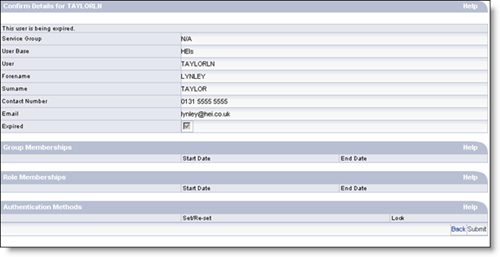
To cancel the expire account process, select Back.
Step 2 - complete the expire account process
Select Submit. This will expire the user’s account and details. The system will take you back to the User Administration page.